Conda Environments
Overview
In this course, we will use different conda environments for different analysis steps.
A conda environment is a separate software workspace. Each environment contains the tools needed for a specific part of the workflow. This helps avoid software conflicts and keeps the analysis organised.
Learning objectives
By the end of this lesson, you should be able to:
- explain why we use conda environments
- list available conda environments
- activate and deactivate a conda environment
- identify which environment is needed for each analysis step
- check whether the correct tools are available
Available environments
For this training, the following environments are available:
base
amr
annotation
assembly
classify
mlst
pangenome
phylogeny
qc
referenceAlways activate the correct environment before running a tool.
For example, use the qc environment for FastQC, and the assembly environment for SPAdes.
List all conda environments
To see all available environments, run:
conda env listor:
conda info --envsThe active environment is usually marked with an asterisk *.
Example:
base                  *  /home/genomevm/miniconda3
qc                       /home/genomevm/miniconda3/envs/qc
assembly                 /home/genomevm/miniconda3/envs/assembly
annotation               /home/genomevm/miniconda3/envs/annotation
Activate an environment
To activate an environment, use:
conda activate environment_nameFor example:
conda activate qcAfter activation, your terminal prompt may show the environment name:
(qc) genomevm@server:~$This means the qc environment is active.
Deactivate an environment
To leave the current environment, run:
conda deactivateIf you run this once, you may return to the base environment.
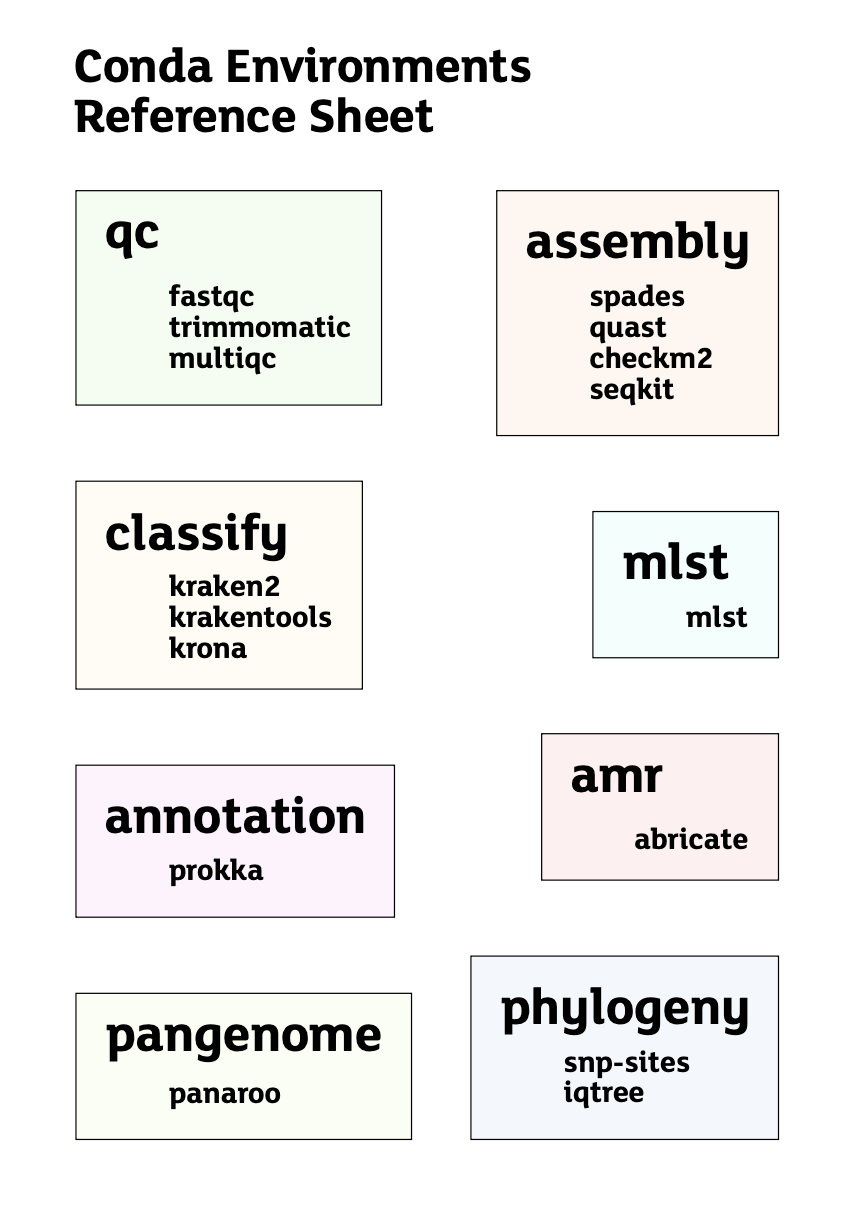
Environment summary
| Environment | Main purpose | Example tools or use |
|---|---|---|
base |
Default conda environment | General terminal use |
qc |
Raw read quality control and trimming | fastqc, trimmomatic, seqkit |
assembly |
Genome assembly and assembly QC | spades.py, quast, checkm2 |
classify |
Taxonomic classification | kraken2, ktImportText, kreport2krona.py |
mlst |
Sequence typing | mlst |
annotation |
Genome annotation | prokka |
amr |
AMR and virulence factor screening | abricate |
pangenome |
Pangenome analysis | panaroo |
phylogeny |
Phylogenetic tree construction | snp-sites, iqtree |
reference |
Reference-based analysis | read mapping or reference-based workflows |
Which environment should I use?
Use this guide during the course:
| Analysis step | Environment to activate |
|---|---|
| Server login and basic navigation | base |
| Raw read QC | qc |
| Read trimming | qc |
| Genome assembly | assembly |
| Assembly quality control | assembly |
| Taxonomic classification | classify |
| MLST | mlst |
| Genome annotation | annotation |
| Copying prepared files | base |
| AMR and virulence factor screening | amr |
| Pangenome analysis | pangenome |
| Phylogenetic analysis | phylogeny |
| Reference-based analysis | reference |
Check the active environment
To check which environment is currently active, look at the beginning of your terminal prompt.
Example:
(qc) genomevm@genome-clone-vm2:~/tanzim$This means you are inside the qc environment.
You can also run:
echo $CONDA_DEFAULT_ENVExample output:
qcCheck if a tool is available
After activating an environment, check whether the expected tool is available.
For example, after activating qc:
conda activate qc
fastqc --version
After activating assembly:
conda activate assembly
spades.py --version
After activating annotation:
conda activate annotation
prokka --version
Common commands
| Task | Command |
|---|---|
| List environments | conda env list |
| Activate QC environment | conda activate qc |
| Activate assembly environment | conda activate assembly |
| Show active environment | echo $CONDA_DEFAULT_ENV |
| Deactivate environment | conda deactivate |
| Check FastQC | fastqc --version |
| Check SPAdes | spades.py --version |
| Check Prokka | prokka --version |
Practical exercise
Complete the following tasks:
- List all conda environments.
- Activate the
qcenvironment. - Check that
fastqcis available. - Deactivate the
qcenvironment. - Activate the
assemblyenvironment. - Check that
spades.pyis available. - Return to the
baseenvironment.
Run the following commands:
conda env list

conda activate qc
echo $CONDA_DEFAULT_ENV
fastqc --version

conda deactivate

conda activate assembly
echo $CONDA_DEFAULT_ENV
spades.py --version

conda deactivateYou should see:
qcwhen you runecho $CONDA_DEFAULT_ENVinside the QC environment- the FastQC version after running
fastqc --version assemblywhen you activate the assembly environment- the SPAdes version after running
spades.py --version
If a command says command not found, check that you activated the correct environment.
Troubleshooting
| Problem | Possible reason | Solution |
|---|---|---|
conda: command not found |
Conda is not loaded | Ask instructor or reconnect to server |
EnvironmentNameNotFound |
Environment name is wrong | Check names using conda env list |
command not found |
Wrong environment is active | Activate the correct environment |
| Tool version not shown | Tool may not be installed | Ask instructor |
| Prompt does not change | Shell prompt may not show environment | Run echo $CONDA_DEFAULT_ENV |
Key points
- Each analysis step has its own conda environment.
- Activate the correct environment before running a tool.
- Use
conda env listto see available environments. - Use
echo $CONDA_DEFAULT_ENVto confirm the active environment. - Use
conda deactivateto leave an environment.
Next step
After learning how to use conda environments, continue with server navigation and raw read quality control.